Thursday, May 14, 2015

Chocolate Lovers' Manual -- Get yours now!


A couple years ago, I created a small “user’s manual” about chocolate. I prepared and then photographed several classic chocolate confections, plus some of my favorites. The “CHOCOLATE LOVERS’ MANUAL” was born with the help of a few chocolate-loving friends, and a lot of chocolate.


It took me over two years to make this manual, starting with the concept, then learning everything I could about chocolate, then trying to fit all that irresistible information onto one 12”x18” page, and then learning enough about professional food photography to create fine-quality photos for the other side of the page. And then the paper search! Finding the right quality of paper – smooth and velvety like a fine chocolate – was a monumental project in itself. Each step was full of discovery, and fully enjoyable. 


I recall the most difficult part of the project was taking good photographs. I read a couple books on professional food photography and took a short course in San Francisco on studio lighting and how to find affordable equipment. However, the most important result was developing a great collaboration and friendship with Rahul Parikh, a chocolate lover and amateur photographer like me. He indulged in a lot of chocolate after each shooting (in fact, it was always more than we should have indulged), but it was really hard work! I have still not thanked him enough for his help.


Since publishing the manual, I’ve received many compliments for both the photography and the amazingly-portable chocolate story that accompanies it. As I continued to melt into the world of chocolate, my brain became more addicted… not only to chocolate as a food and beverage, but to the whole idea of its impact on health, fashion, art, (music?) and more! So I decided to create a new blog dedicated to you – all the Chocolate Lovers whose hearts beat for chocolate.


CocoBeat Blog will be about recipes, of course, along with more tasty photography and chocolate-inspired stories/insights to enjoy. Meanwhile, follow this link to the “Cocobeat

Stay tuned, and addicted, to CocoBeat! 


Tuesday, May 5, 2015

May 5th in Japan -- Boys' Day


Today is May 5th. It is a national holiday in Japan and also Boys’ Day there. We put out huge colorful carp fish banners (Koinobori) on tall bamboo poles and let them “swim” in the blue sky, we display an impressive samurai warrior’s helmet (Kabuto) in the living room, and of course we eat the traditional Boys’ Day feast to celebrate the best season of the year.

I still have many memories of Boys’ Day from my childhood. The most special food of the day is called “Chimaki” – sweet red beans in the center of sweet sticky rice wrapped in bamboo leaves and steamed. It looks a little bit like Mexican tamales, but the taste and flavor is very unique and different. It is said that warriors carried it onto the battle field in ancient China.


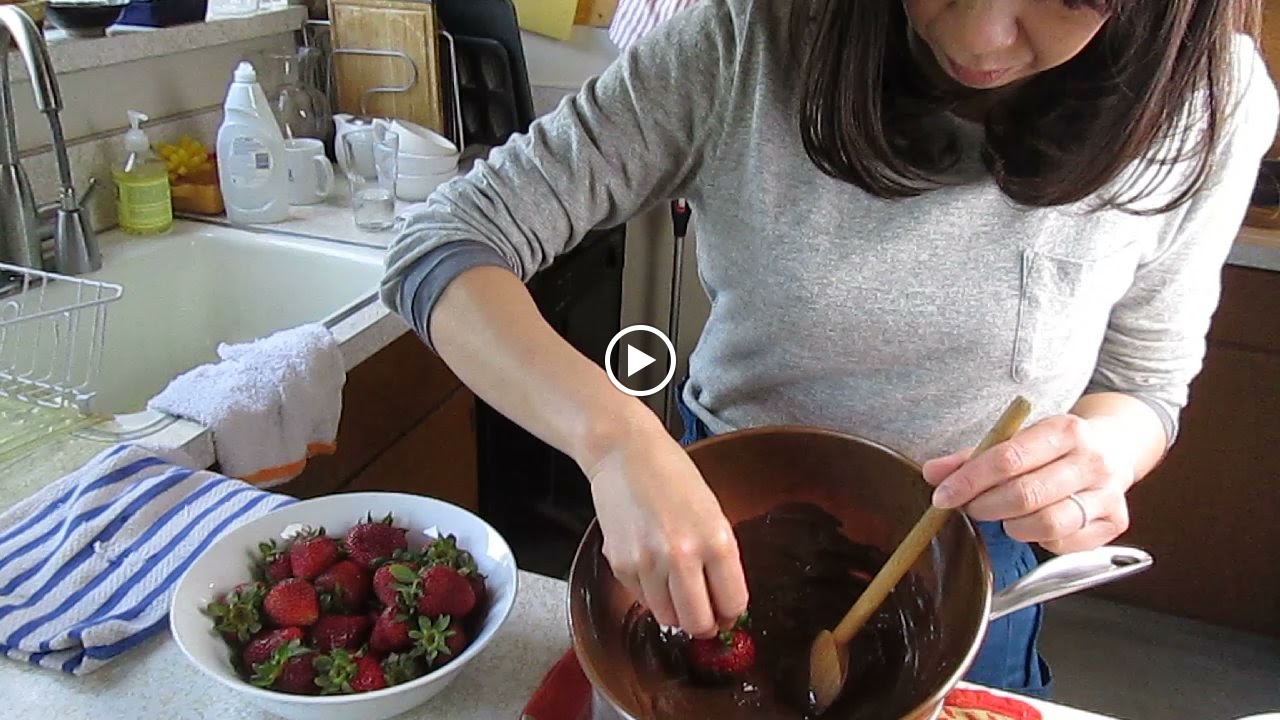
My life has been here in California for a long time, and nobody makes Chimaki for me anymore. Plus I became quite westernized. Nowadays fresh strawberries, dark chocolate and Sauternes are my favorites, and go very well together. Their taste, flavor and aromas are fantastic if you get the best quality, which won’t set you back too much. And the memory of them on your palate will last forever!


Sauternes is a very delicious dessert wine made from Semillon grapes in Bordeaux, France. It is one of the finest dessert wines in the world, and known for its taste, flavor and aroma.

 So, indulge and celebrate the best day of spring with three simple, memorable ingredients.


This is my wonderful kitchen assistant Masumi san. She always executes everything exactly as I ask.


Thursday, April 30, 2015

French Cheesecake - Tourteau Fromager... You gotta make it!


Here in the Bay Area the sun is getting strong – more like summer than spring. We are having a long drought in California, and the green of winter/spring is already turning brown. My small backyard is more like a jungle than usual for late April… and at its unruly peak. Now is the time to enjoy the cool evenings, which make me think about warm French springs, fresh goat cheese, and… cheesecake!

In France you often see this cake in the cheese shop rather than pastry shops. It is made with fresh goat cheese and baked in a very hot oven, which is why the top is dark but the inside is soft and moist. If you are interested to see what the traditional/original Tourteau Fromager looks like,
check these images.

It’s nothing like the typical American cheesecake. I’ve been baking this quite often recently and never get tired of it; I think because it is so light, not too sweet, and perfect to eat with fresh strawberries (another one of my favorite things about spring). I enjoy a small slice of the cake with a good cup of tea, or even a small glass of Cognac or other bandy after dinner.

You may use Fromage Blanc (farmers cheese) if, like some of my friends, you don’t like goat cheese. Whichever cheese you use, this is sure to be une découverte magnifique!  


French Cheesecake (Tourteau Fromager) -- using soft fresh goat cheese

Recipe adapted and modified from My Paris Kitchen, by David Lebovitz  

For one 9-inch springform pan (serves 10-12)

Sweet pastry dough (Pâte Sablée):
1½ cups all-purpose flour
2 tablespoons granulated sugar
¼ teaspoon salt
1 large egg, beaten
4 ounces (110g) unsalted butter, chilled and cubed
2 tablespoons water

Filling:
10 ounces mild fresh goat cheese (or Fromage Blanc)
2 tablespoons sour cream or crème fraiche
1 cup (200g) sugar
1 teaspoon vanilla extract
1 teaspoon Cognac or brandy (optional)
4 large eggs, separated, at room temperature
Scant ½ cup (60g) all-purpose flour

Fresh berries in season (optional) as garnish

Preparation:

1.      To make crust, in the bowl of a stand mixer fitted with the paddle attachment (or in a bowl, by hand), combine the flour, sugar and salt. Add the chilled butter and beat on low until the butter is crumbled and mixture resembles cornmeal. Add the eggs and ice water and beat until the dough comes together.
Gather the dough and shape into a flat disk. Wrap the dough in plastic and refrigerate for at least 30 minutes or up to one day.

2.      Preheat the oven to 425F (210C).

3.      Remove the dough from the refrigerator and roll it out on a lightly floured surface into a 15-inch circle. Fit the dough into a 9-10 inch springform pan, lifting the sides of the dough and releasing it to ease the dough into the corner of the pan without stretching it, then press it gently to adhere it to the sides. Trim any overhang with a sharp knife.

4.      To make filling, in the bowl of a stand mixer fitted with the paddle attachment (or in a bowl, by hand), beat the goat cheese with the sour cream, half of the sugar, the vanilla, and the cognac on medium speed until well combined. Replace the paddle attachment with the whip attachment and add the egg yolks. Beat on medium-high speed (or use a sturdy whisk and whip by hand) until smooth, then mix in the flour.

5.      In a separate bowl, whip the egg whites on medium-high speed until they hold their shape.  Add the remaining sugar and whip until the whites hold their shape when you lift the whip attachment. Fold one-third of the whites into the goat cheese mixture, and then fold in the remaining whites in two batches, just until you no longer see any streaks of egg white in the batter.

6.      Scrape the batter into the dough-lined pan and smooth the top.  Bake for 20 minutes without opening the oven door. Decrease the oven temperature to 375F (195C), and continue to bake for 15 minutes. Let the cake cool completely on a wire rack, and then carefully remove the sides of the springform pan. Slice and serve the cake at room temperature. 


Monday, July 21, 2014

Tiramisu for Those Who Love Chocolate


When I was a bit younger (a lot younger) busy cooking in restaurants in the ‘80s, tiramisu made a sensational debut and became a very popular dessert in chic restaurants not only in the U.S. but around the globe.  It is a very simple cold dessert, but this combination of Italian cream cheese (mascarpone), strong coffee (espresso) and liquor flavor was a very fresh idea – so provocative and enchanting to the palate that no one could resist it. I, too, instantly loved it when I first tasted it. Since then tiramisu has become the number one Italian dessert (something like sushi has become for Japanese food in America).

What I really like about this dessert (besides that all pretty women will be impressed if you can make it) is that it is very easy to make: You just mix the ingredients and assemble... no baking. The only problem is that people cannot wait to taste it before it has chilled/set for at least a few hours.  It is a great dessert any time of the year – whether in summer or during the winter holidays. These days I often put some shaved dark chocolate on top, to make it ... over the top!


I have tried many different recipes but this one is simple and comes out perfect. Nowadays domestic mascarpone is widely available in supermarkets. However, you should try using imported Italian Mascarpone. It is creamier and more flavorful, and you can taste the difference in the results. If you cannot find lady finger cookies (Amazon has them), you can make your own (even a gluten-free version). You can also use sponge cake (which I often do at work) or simple butter or sugar cookies instead. 


Tiramisù
6-8 servings

1/4 cup (125ml) espresso at room temperature
1-2 tablespoons dark rum, brandy or grappa
3 “very fresh” large eggs, separated, at room temperature
1/2 cup (100g) sugar, divided
8 ounces (250g) mascarpone at room temperature
About 20 Italian ladyfingers/Savoiardi (7 ounces/200 g)
1 ounce (30g) bittersweet chocolate, shaved
Unsweetened cocoa powder, for sprinkling between layers and on top


1.      In a small bowl combine the espresso with rum or cognac. Set aside.

2.      In the bowl of an electric mixer fitted with whisk, or by hand, beat the egg whites until they begin to get stiff. Beat in half of the sugar until stiff. Set aside.

3.      In a medium-sized bowl, beat the egg yolks with the remaining sugar until thick and light-colored, about 2 minutes. By hand, beat in the mascarpone with a spatula or whisk, until lump-free.

4.      With a large spatula, fold in half of the beaten egg whites gently, then the remaining half, just until fully incorporated.

5.      Place a single layer of 12 ladyfingers (two rows of six each, end to end) in a 9-inch (22.5-cm) square baking dish or glass dish. Dip a pastry brush into the coffee mixture and brush/soak the biscuits with the liquid. Spread about half of the mascarpone cream over the biscuits. Sprinkle with about one half of the grated chocolate and cocoa powder.

6.      Repeat with a second layer of the biscuits, brush the biscuits with remaining liquid, and cover with the remaining mascarpone cream. Cover and refrigerate at least 4 hours, allowing the cream to firm up slightly and the biscuits to absorb some of the liquid, preferably overnight.

If using individual cups (about 6-ounce), put a heaping soupspoon of the mascarpone cream into each individual glass cup/ramekin. Break a ladyfinger and place onto the cream. Brush or drip espresso mixture onto ladyfinger and top with some shaved chocolate and cocoa powder.  Repeat with a second layer of biscuit and remaining liquid, and then cover with remaining mascarpone cream. Cover and chill in the refrigerator until firm – at least 3-4 hours. Use about 2-3 ladyfingers per individual cup.

To serve, divide the tiramisu into rectangular slices and transfer to chilled dessert plates. Right before serving, shake powdered cocoa generously on top and add more shaved chocolate.

Note:  I used an 11-inch x 7-inch (2 quarts) Pyrex glass baking dish for the photography. The Italian ladyfingers I used are 4-inches long and 1-inch wide. 


Monday, June 30, 2014

Wine with screw cap, no cork


I am a minimalist but also a traditionalist. Until a little while ago I did not pay any attention to wine in bottles with a screw-top cap. They are normally associated with cheap, poor quality wines. However, I am changing my policy, or, maybe I should say, my stereotype about these wines. Some of them are quite good  these days, and there is that convenience factor -- no corkscrew is required to get into the bottle. It may also be good for those who suffer stiffness and hand pain such as carpal tunnel syndrome or arthritis (my right hand is getting it). And then there is the time and expense of teaching new service staff how to use a waiter’s corkscrew to open a bottle. I have to give my staff a lot of practice opening "sacrificial" wines, and that costs $$ (my boss is not happy!). Unfortunately, some people never can get the hang of it (or maybe they just want to drink a lot of wine).


Anyway, more and more wines are coming in screw-cap bottles these days. I recently visited my favorite neighborhood wine shop, K&L Wines, and was surprised to see many screw-cap wines available in the mid-price range/quality (around $20-$30 a bottle); some of them are even more expensive ($40-$50). I noticed that many are from Spain, New Zealand, Australia, Oregon and Washington, and it is gradually becoming more common among California wines as well.

I still do not see many from France or Italy. However, I definitely prefer screw-cap wine to those with plastic or synthetic corks, which are quite often very hard to remove from the bottle and also hard to take out from the corkscrew. Bravo screw cap!